
Using VS Code for TEI Editing
Overview
In scrounging around the internet for a post on setting up Visual Studio Code for text encoding, I realized to my annoyance that there wasn’t one. That’s not really all that surprising, given the average shelf life of these tools. It wasn’t all that long ago that I bookmarked Andrew Dunning’s excellent “Getting started Getting started with editing TEI XML using Atom” (RIP Atom 😢). Why bother going through this again for the current text editor du jour? Well, if you are like me, you work with students who are often rather computer savvy but who still need clear instructions. So here I am blogging my own project documentation for myself and possibly for you.
My context for writing this post is a pedagogical editorial project called the Correspondence of the Rutgers College War Service Bureau. I periodically work with student interns who are interested in working on projects at the intersection of archives, history, and technology. This World War I project is all that plus valuable institutional history. The letters by and about these Rutgers men give us a glimpse of early twentieth century college life (Rutgers wouldn’t become a university until 1924) and touch upon themes common to WWI histories such as anxiety, death, disability, and masculinity. It usually doesn’t take long before the student realizes that they are the same approximate age as the men whose letters they are editing, sometimes prompting revelatory and uncomfortable comparisons. In my own textual editing, I tend to use the Oxygen XML Editor, which is proprietary but an academic license is not beyond reach. Once one becomes a bit more familiar with XPath and other XML family languages, its many features start to become addictive. However, students usually don’t need all that functionality, hence the desire for a fully open source work environment.
VS Code is already favored by students with a programming bent at my institution. Asking them to install a few VS Code extensions, and maybe Java, and—what the hell—Saxon HE too, is at least free if not easy. My instructions below are for the Mac operating system. If any courageous individual wants to write up instructions for Windows, please do so and then tell me about it! I know that I will need to point to Windows instructions soon.
Installations
Go to code.visualstudio.com/download and select the installer for your operating system. Open the zipped file. This should automatically launch the installation process. Double click on the new Visual Studio Code shortcut appearing on your desktop to ensure it opens as expected. Macs will give you a warning about it being an “app downloaded from the Internet” and are you sure? Yes. Click Open.
Alternatively, if you are already a Homebrew user, you can install VS Code in Terminal with the following command:
brew install --cask visual-studio-code
And then type open -a "Visual Studio Code".
When you open VS Code, you will see a series of icons in the left menu. They are in descending order: Explorer, Search, Source Control, Run and Debug, and Extensions. We will focus on Extensions for now.
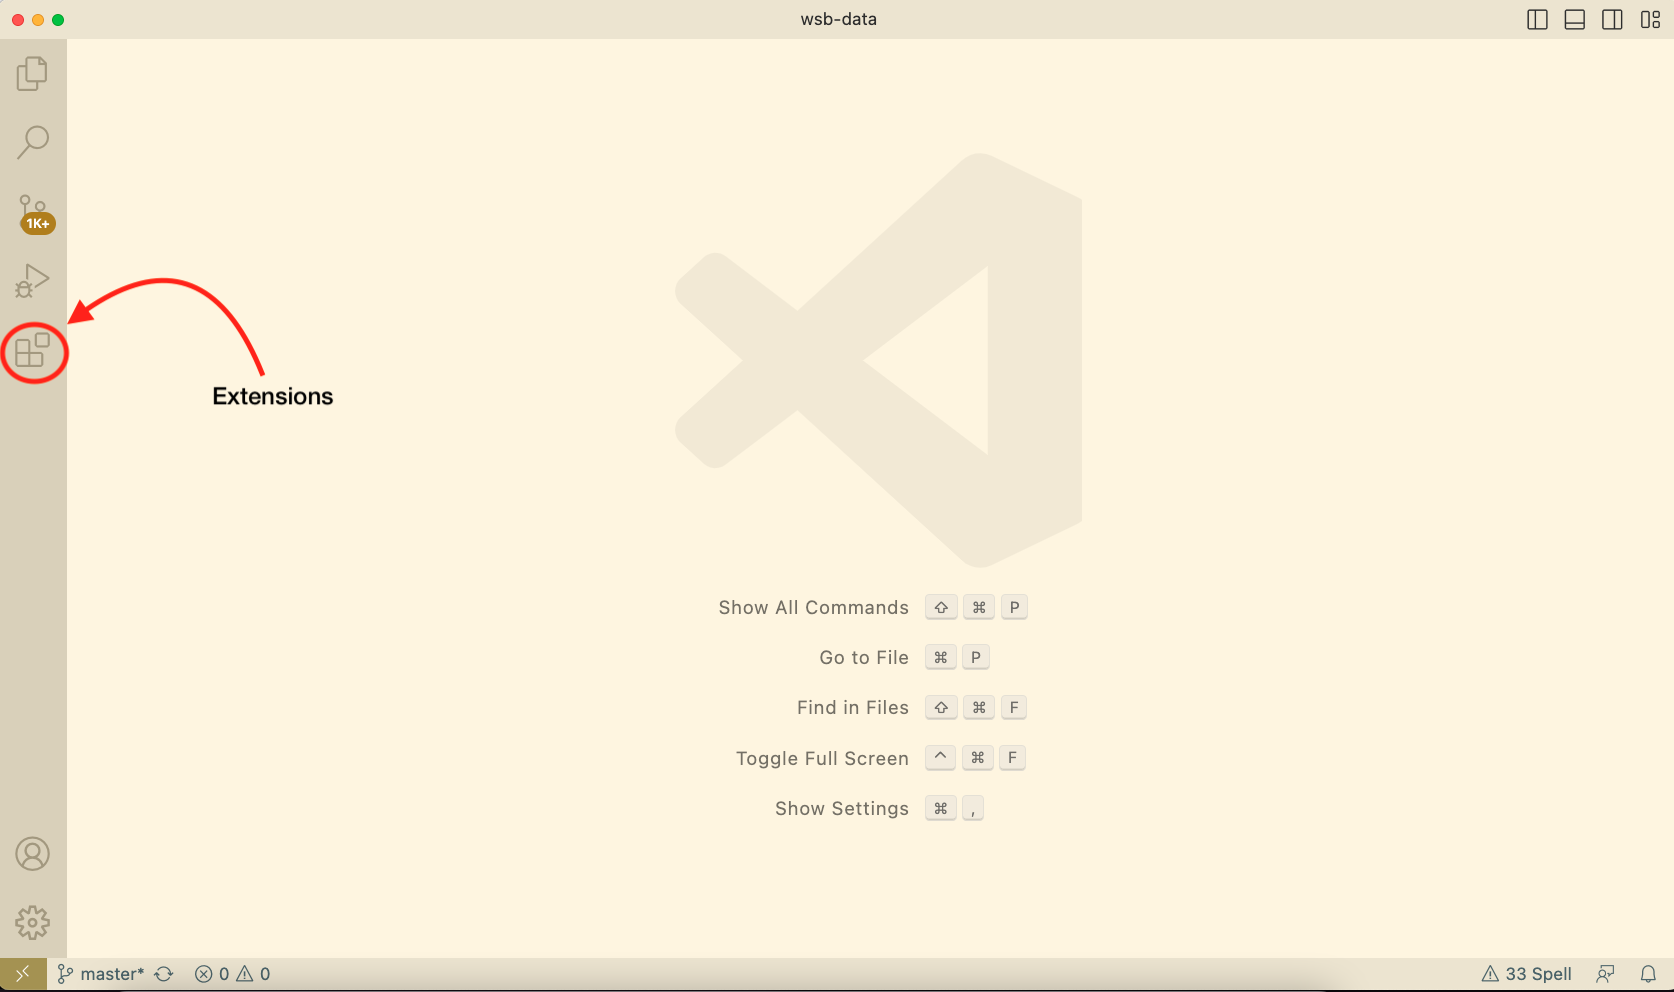
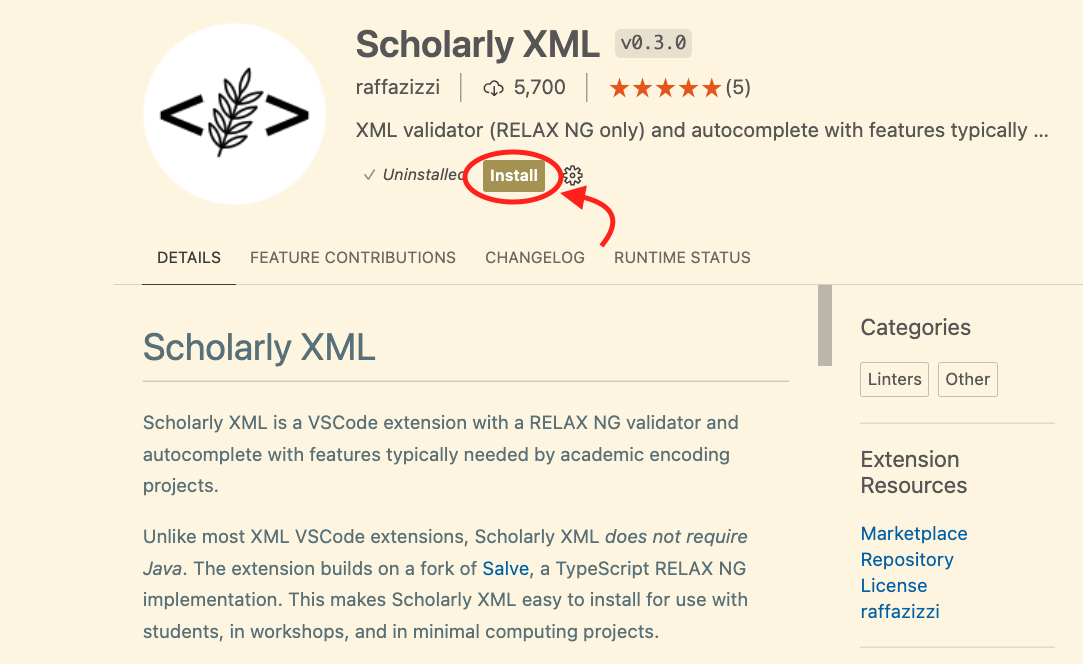
Click on Extensions and use the search bar to locate Scholarly XML. Select it and press the install button. We will use Scholarly XML to check that our XML is well formed and valid. What does that mean? In a nutshell, we want our XML file to conform to the XML syntax rules and to use valid Text Encoding Initiative element and attribute names.
Verify that Scholarly XML is working as expected by opening a new text file in VS Code. Copy the XML snippet from the extension page under the Validation subheading and paste it at the top of your new text file. VS Code should autodetect that you are working on an XML document. If you get a red squiggle under the pasted snippet and a warning that you are missing the teiHeader tag, the validator is working!

We could stop here if we are content with the ability to ensure our XML is well-formed and valid against the TEI schema. However, error checking is much easier when you can transform your TEI XML into HTML for the web. With that in mind, we are going to install two more extensions in VS Code. Follow the same installation procedure as before.
The XSL Transform extension has two external dependencies that we will need to install separately. Those are Java and Saxon Home Edition or Saxon-HE.
Download the Java installer for your operating system. Double click on the .dmg file to launch the installation process. See the Java website more detailed instructions.
Verify that you have Java installed on your machine. In a Terminal window, type
/usr/libexec/java_home
If you have more than one Java installation, try also
/usr/libexec/java_home -V
I have three installations. The one I use for XSL transformations is located at
/Library/Java/JavaVirtualMachines/jdk1.8.0_77.jdk/Contents/Home
Install Saxon-HE by downloading it from here: https://github.com/Saxonica/Saxon-HE. As of this writing, the latest stable version is 11.5. Back in your Mac, use Finder to go to folder: /Library/Java. Within this directory, if you do not already have a folder called Extensions together with one called JavaVirtualMachines then create one now. Inside Extensions drag and drop the Saxon jar. For example, my Saxon is located at the following path: /Library/Java/Extensions/saxon-he-10.6.jar (yes, I’m a few versions behind).
Settings Configurations
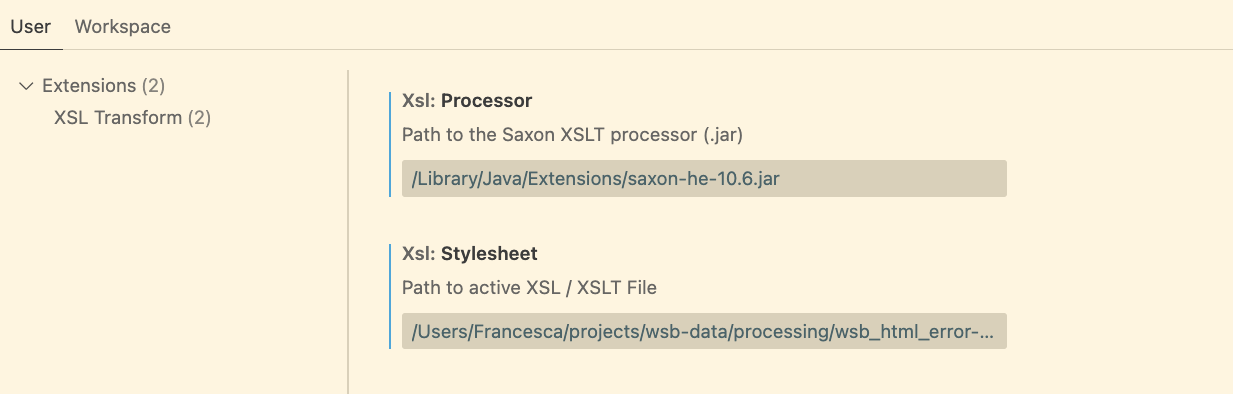
Back in VS Code under Extensions, click on the settings wheel for XSL Transform and select Extension Settings. Under Xsl:processor enter the path to your Saxon (again, mine is /Library/Java/Extensions/saxon-he-10.6.jar). Download this XSLT stylesheet for the War Service Bureau project. Then, copy the path to where this stylesheet is located on your computer and enter it into the XSL Transform settings under Xsl:stylesheet. Mine is at /Users/Francesca/projects/wsb-data/processing/wsb_html_error-checking.xsl.
Open a sample letter anthology for the War Service Bureau in VS Code (e.g. Ainsworth or Bracher). With the letter anthology open, press Shift + Command + P to get the command palette. In the search bar, start to enter “transform” until you see the xsl.transform command. Press enter. Alternatively, use the XSL Transform keyboard shortcut (control + option + T on a Mac). An unnamed HTML document should open in VS Code. Save it as test.html or use the file prefix of the file you transformed (for example: voorheesjb.html). Next, with your cursor in the HTML document, return to the command palette to run HTML: Open Preview (this is part of the HTML Preview extension). It should generate an HTML preview inside of VS code. Alternatively, you can simply open the HTML file in the browser of your choice to inspect. Voilà!
The screen capture above shows what the XSLT transformation looks like in VS Code.
Reading your encoding as HTML is much easier on the eyes and is good error checking practice!
Comments